

How To Autostraighten A Graduated Filter In Lightroom
Lightroom series function 7: Fix skies with ease in Lightroom with a Graduated Filter
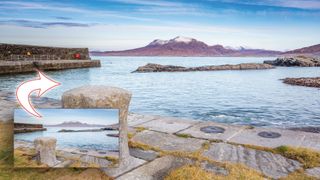
In whatever landscape shot, the sky can exist just every bit of import every bit the landscape itself, but the different in brightness between the heaven and the land can be an upshot. Here's how to heighten and improve skies in Lightroom.
Welcome to the seventh instalment of our Lightroom series, first published in Digital Camera magazine (come across below for subscription offers).
If y'all are already a Lightroom user, you could discover some new tricks and processes you oasis't tried yet. If yous don't employ Lightroom, and so scroll downwards to the bottom where you lot'll detect how to become information technology and which Adobe Photography Plan is best.
Note: This article was written for Lightroom half dozen. The panels and control have changed since then, but the tools and the concepts are the aforementioned.
When you shoot landscapes, you'll encounter that the sky in your photos is oftentimes much brighter than the ground. Traditionally, experienced mural photographers employ graduated neutral density filters, which take a darkened pinnacle with a clear bottom, in front of the lens. They're unremarkably measured in exposure reduction, then you'll run across one-stop graduated neutral-density filters for example. The tint is gray on these, and then they don't change the colour in the sky.
These filters nonetheless take a place in digital photography to get the all-time look in-photographic camera, but Lightroom allows you to recreate these filters digitally, with more options for changing the exposure or colour in the sky.
• Run into more Lightroom tutorials (opens in new tab)
i. Graduated Filter controls
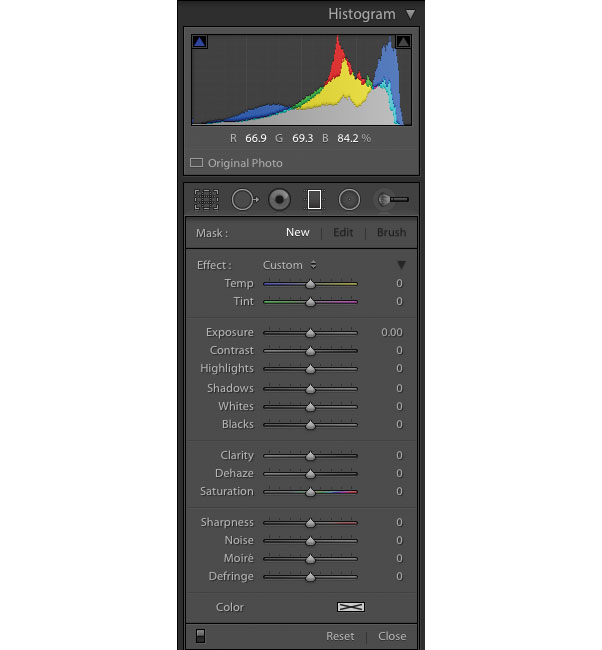
Open up the Graduated Filter from the Toolstrip under the Histogram in Develop. You can also apply the keyboard shortcut M. If you need to reset the current settings, double click on the Consequence text.
2. Get the look
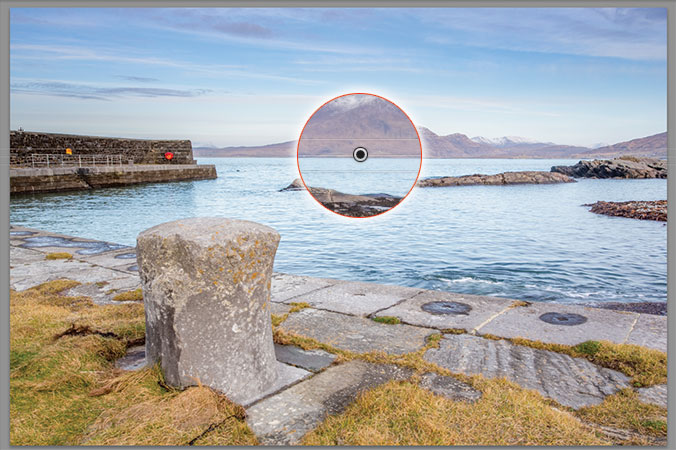
Click above the skyline and drag downward until you're below it. If y'all desire a hard line on the horizon, only drag a short distance. For a softer await, elevate much further. To go along the filter straight as you elevate, concur the Shift primal. To alter position, click and drag the pivot.
three. The Dehaze slider

For skies, you should first with the Dehaze slider. This removes the haze, but at the same time increases contrast and saturation. It likewise darkens the area information technology works on, which is why it's skilful to employ before or instead of changing exposure. I've gone for a value of thirty here.
4. Exposure slider

If Dehaze has darkened too much, or if you prefer the sky darker, go to Exposure and change it to go what you want. For this image, I increased the exposure subtly (+0.25) to bring ameliorate balance to the heaven. (The original image did use a real ND grad filter just it wasn't stiff plenty. Dehaze has darkened information technology too much.)
five. Highlights
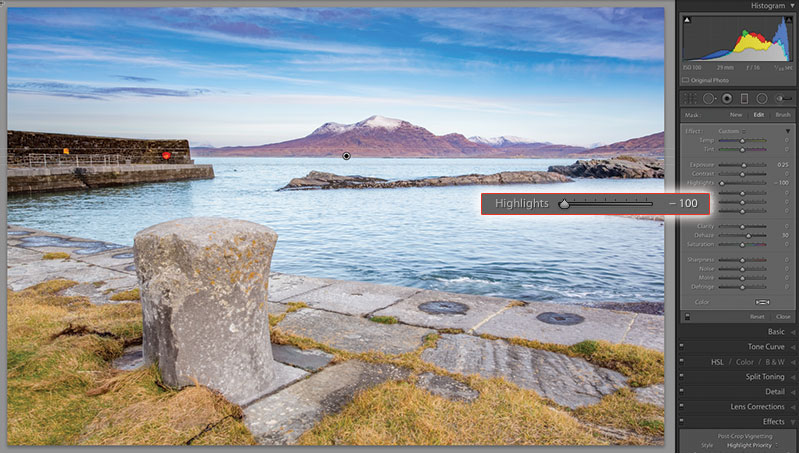
If there's a lot of deject, you can pull the Highlights slider down to end them being too bright. Don't exist afraid to go the whole way downwardly – you tin e'er get back!
6. Contrast
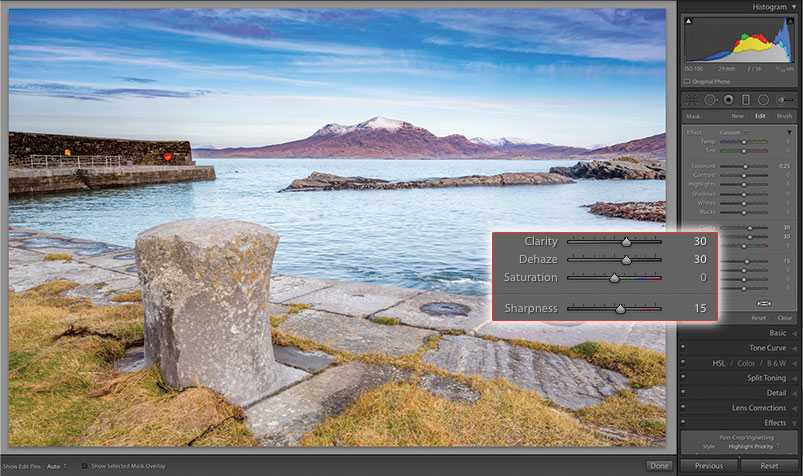
At that place a few other options worth using. Tweak Sharpness to ameliorate ascertain the clouds (+xv); view the epitome at ane:one when changing this. Increase Clarity (+xxx) to boost local contrast. You may want to have a go at adjusting Contrast too.
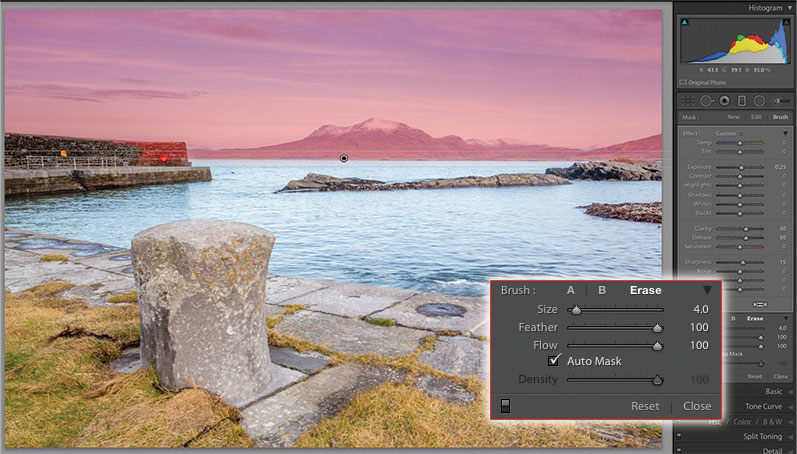
The Graduated Filter is a linear tool, so anything that'due south above the horizon will take on the effects you lot utilize to the sky. Lightroom has a set for this: in the Mask section, select Castor. From the Brush section that appears, select the Erase brush. Alter Size and Feather to Taste. Mostly I leave Flow and Density at 100.
Car Mask should be on if the part you want to remove has hard edges. To make the Mask (the area where the Grad is working) more visible, press O to evidence a cherry-red overlay.
Apply the Erase brush to remove the mask from the area y'all need to bring back. In this image, I'chiliad immigration the mask off the pier to bring information technology back to normal. It's great for bringing foreground elements back to where they were earlier yous applied the Graduated Filter.
Nigh Digital Camera magazine
This tutorial originally appeared in Digital Camera Magazine, the monthly newsstand magazine for all photographers. Why notsubscribe (opens in new tab) to a print edition, and accept the mag delivered directly to your door every month?
Alternatively, we take a number of different digital options available, including:
• Apple tree app (opens in new tab) (for iPad or iPhone)
• Zinio app (opens in new tab) (multi-platform app for desktop or smartphone)
• PocketMags (opens in new tab) (multi-platform app ideal for Android devices)
• Readly (opens in new tab) (all-you-can-consume digital mag subscription service)
If you wanted a printed version of any of our most recent problems we have a selection of dorsum issues (opens in new tab) to cull from in our online store.
How to get Adobe Lightroom
Adobe Lightroom is bachelor in two versions: the regular Adobe Lightroom Classic CC designed for desktop users, which is what nosotros cover in this series, and a new cloud-based Adobe Lightroom CC, which stores your files online and offers a like simply reduced set of features. For regular desktop users we recommend Adobe Lightroom Archetype CC.
Adobe offers three subscription based Photography Plans which yous can click on below. We recommend either the regular Photography Plan, or the Photography Plan (1TB) which costs more but comes with 1TB online storage in case y'all decide to become with Lightroom CC.
For this set up of tutorials and for anyone who likes to piece of work on a single main computer, nosotros recommend the regular Creative Cloud Photography Plan (opens in new tab). This is the cheapest mode to get started AND it comes with Photoshop CC likewise.
![]()
Read more:
• This is the best photo-editing software (opens in new tab) today
• These are the best laptops for photographers (opens in new tab) right now
• We help you choose the best desktop computers for photograph editing (opens in new tab)
Related articles

How To Autostraighten A Graduated Filter In Lightroom,
Source: https://www.digitalcameraworld.com/tutorials/lightroom-tutorial-7-fix-skies-with-ease-in-lightroom-with-a-graduated-filter
Posted by: hayneswhospartin1961.blogspot.com
0 Response to "How To Autostraighten A Graduated Filter In Lightroom"
Post a Comment